Security Profile: Configuring PLCnext Engineer
![]() For information on how to use PLCnext Engineer or how to create a project, refer to the Getting started with PLCnext Engineer topic in the main PLCnext Technology ‑ Info Center.
For information on how to use PLCnext Engineer or how to create a project, refer to the Getting started with PLCnext Engineer topic in the main PLCnext Technology ‑ Info Center.
- Open PLCnext Engineer.
- Open the project that you want to transfer to the PLCnext Control.
- First set the IP address range, then the IP address for the expansion module.
- Only release the subnet range that you actually need.
![]() For information on configuring the IP settings, please refer to the Configuring the IP settings topic in the main PLCnext Technology ‑ Info Center.
For information on configuring the IP settings, please refer to the Configuring the IP settings topic in the main PLCnext Technology ‑ Info Center.
...continuation see next page...
- Connect PLCnext Engineer to the PLCnext Control by clicking the
 button (Connect to the controller to establish communication with online services).
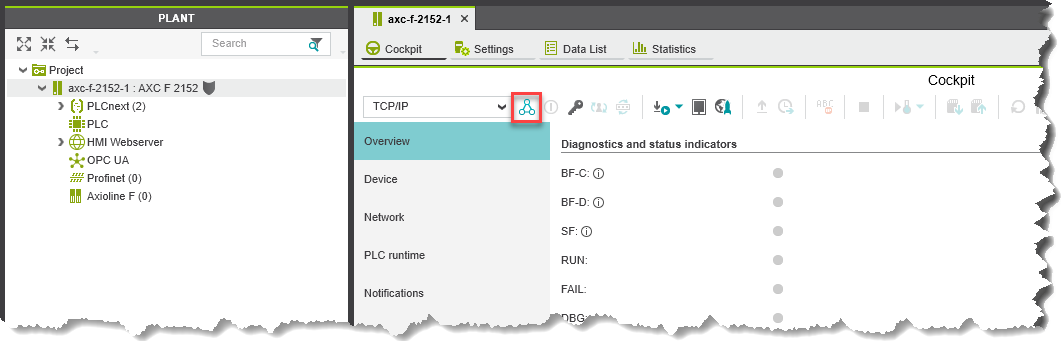
↪ The SECURE DEVICE LOGIN opens.
Note: To ensure that you are connecting to the correct device, you must compare the serial number displayed in the login dialog with the serial number printed on the device.
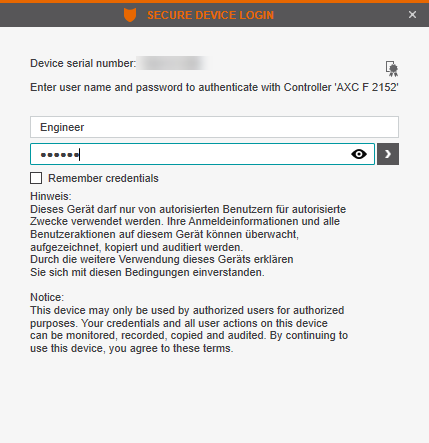
- Make sure that you are connecting to the correct device by checking the displayed serial number.
- Enter your user name and your password.
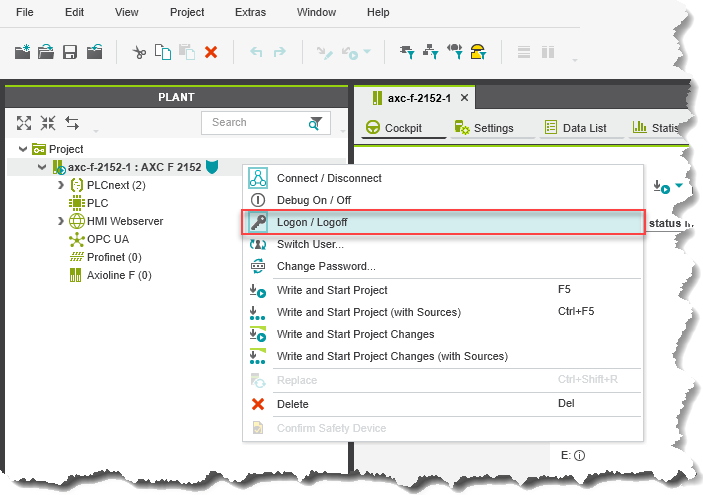
Note: You have to log in with the user who has the role "Engineer". - Display the context menu of the controller node in the PLANT area via mouseover.

- Make sure you are connected to the correct device (Device serial number).
- Check how you are logged in (User Name) and what role you have (Roles).
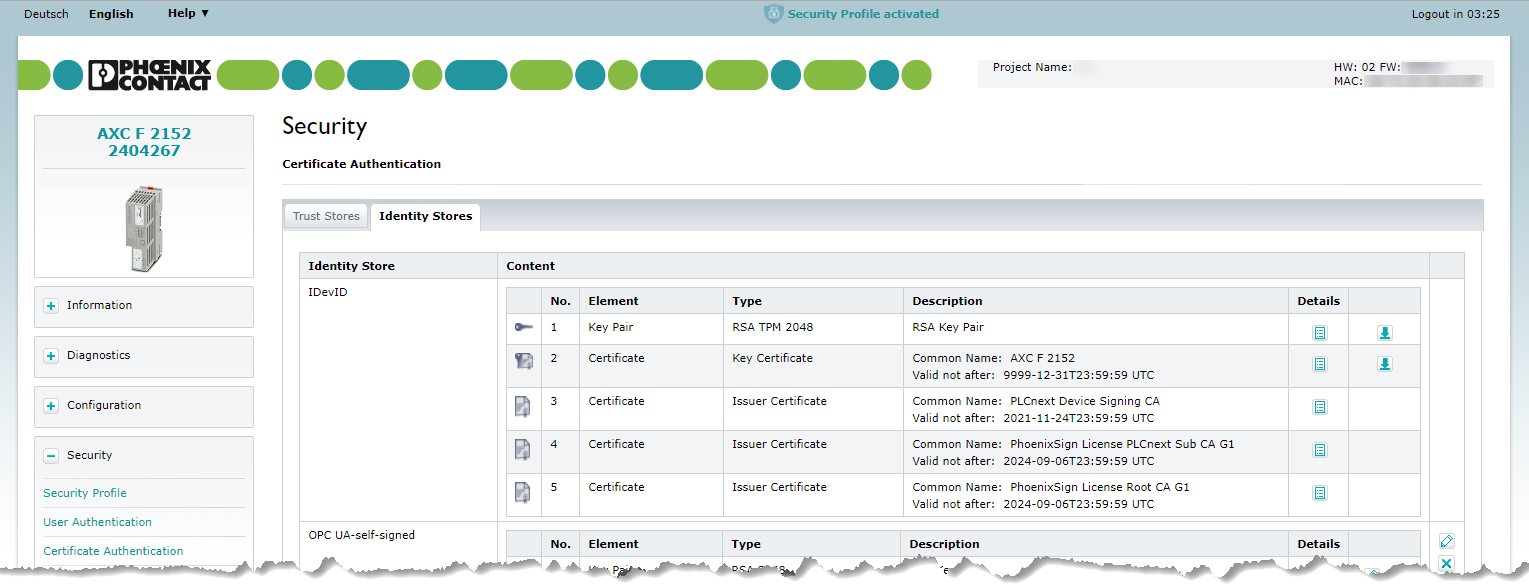
- The lower section of the context menu lists the certificates and issuers that were applied to the device.
You can also see this information in the WBM on the Certificate Authentication page on the Identity Stores tab.
- Transfer the system time to the PLCnext Control by clicking the
 button.
 - Transfer the project to the PLCnext Control.
- After transferring the project to the PLCnext Control, log out of PLCnext Engineer via the context menu, which you reach by right-clicking on the controller node in the PLANT area.
Substitution behavior for output modules
For each output module you can define a substitution behavior in PLCnext Engineer. The default setting is set to '0'. Depending on your application you have to adjust the setting.

Activating PLCnext Engineer project data integrity check
In PLCnext Engineer from version 2023.0, you can enable the project integrity check (hash protection of projects and libraries locally stored on your computer). With activated Enabled checkbox (hash protection is activated), PLCnext Engineer calculates hash codes (numeric value of fixed length that uniquely identifies data) about the project. The project's hash codes are checked for mismatching or missing hashes when opening the project. Depending on the protection level selected here, you will be informed with a warning/error message and the appropriate action will be performed.
With deactivated hash protection (Enabled checkbox deactivated; default setting), PLCnext Engineer does not use hash codes for comparison of project contents. No hash codes are calculated and checked. You will not be informed whether a project has or does not have hash codes.
Phoenix Contact recommends to enable the hash protection (data integrity check). Proceed as follows:
- In PLCnext Engineer, open the options menu: Extras → Options...
- Open the Administration drop-down menu.
- Click on Data integrity.
- Activate the checkbox Enabled.
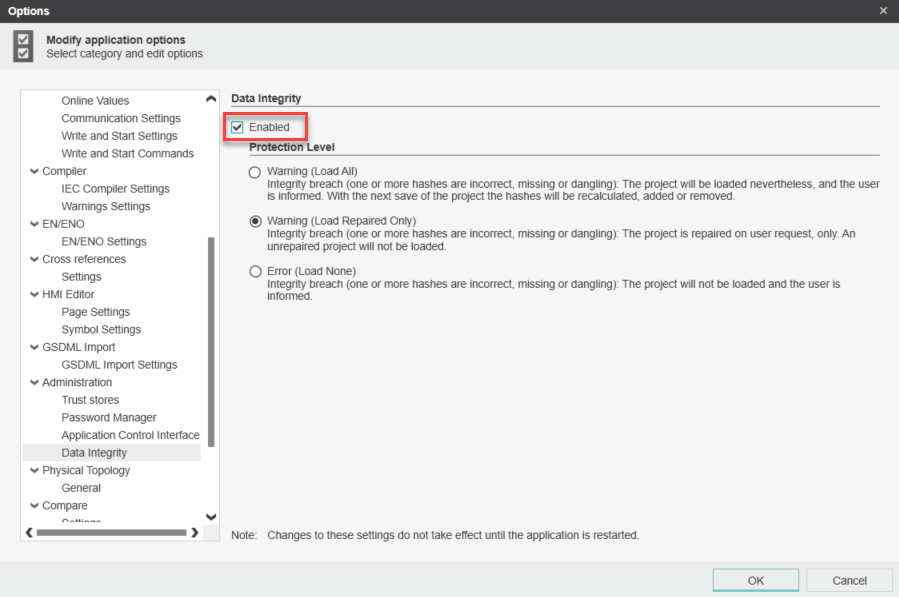
- Click the button.
- Restart PLCnext Engineer.
For further information, refer to the topic Configuring PLCnext Engineer (combined safety).